Become comfortable with the possibilities and limitations of animating with keyframes, tweening, and easing in After Effects. Start to consider spatial relationships, pacing, and practice some of the Principles of Animation as they pertain to motion graphics. Create one movie with multiple animations in it and upload to Exercise2 Slack Channel.
First 5 steps in progress (unrendered/don’t need to export or upload yet) are due Thurs, Sept 30 and the whole rendered and uploaded video of 10 steps is due next Tues, Oct 5th.
Exercise Specs
Click to ViewGo to Composition > New Composition
Aspect Ratio: 1920px x 1080px
All parts/animations should be approximately 3-5 seconds long at 24 frames per second, so make the duration of your entire composition at least 50 seconds long to fit all 10 parts.
Label each part in your movie. Put text in one of the corners identifying which part it is.
Objectives
Click to View- Spatial relationships/illusion of depth
- Natural motion/easing
- Principles of animation
- Concept innovation (where applicable)
- Composition and design choices
Rubric
Click to View
15pts
- Spatial relationships & iIllusion of depth
- Natural motion & principles of animation
- Composition & other design considerations
Student Examples
Click to ViewTechnical Help
Click to ViewGraph Editor help for Parts 6-10
- Intro to Animation Curves in AE
- Using Speed Graph (13:00-18:00)(18-25:00 adds squash and stretch)
- Using Value Graph (1:00-7:00 / adds follow-through)
- Animation Principles AE Quick Tips / Downloadable Files for some of these (includes squash and stretch, secondary animation, graph editor, follow-through)
- Basic Easing Tutorial
Part 1: Timing + Slow In/Slow Out Principles (position)
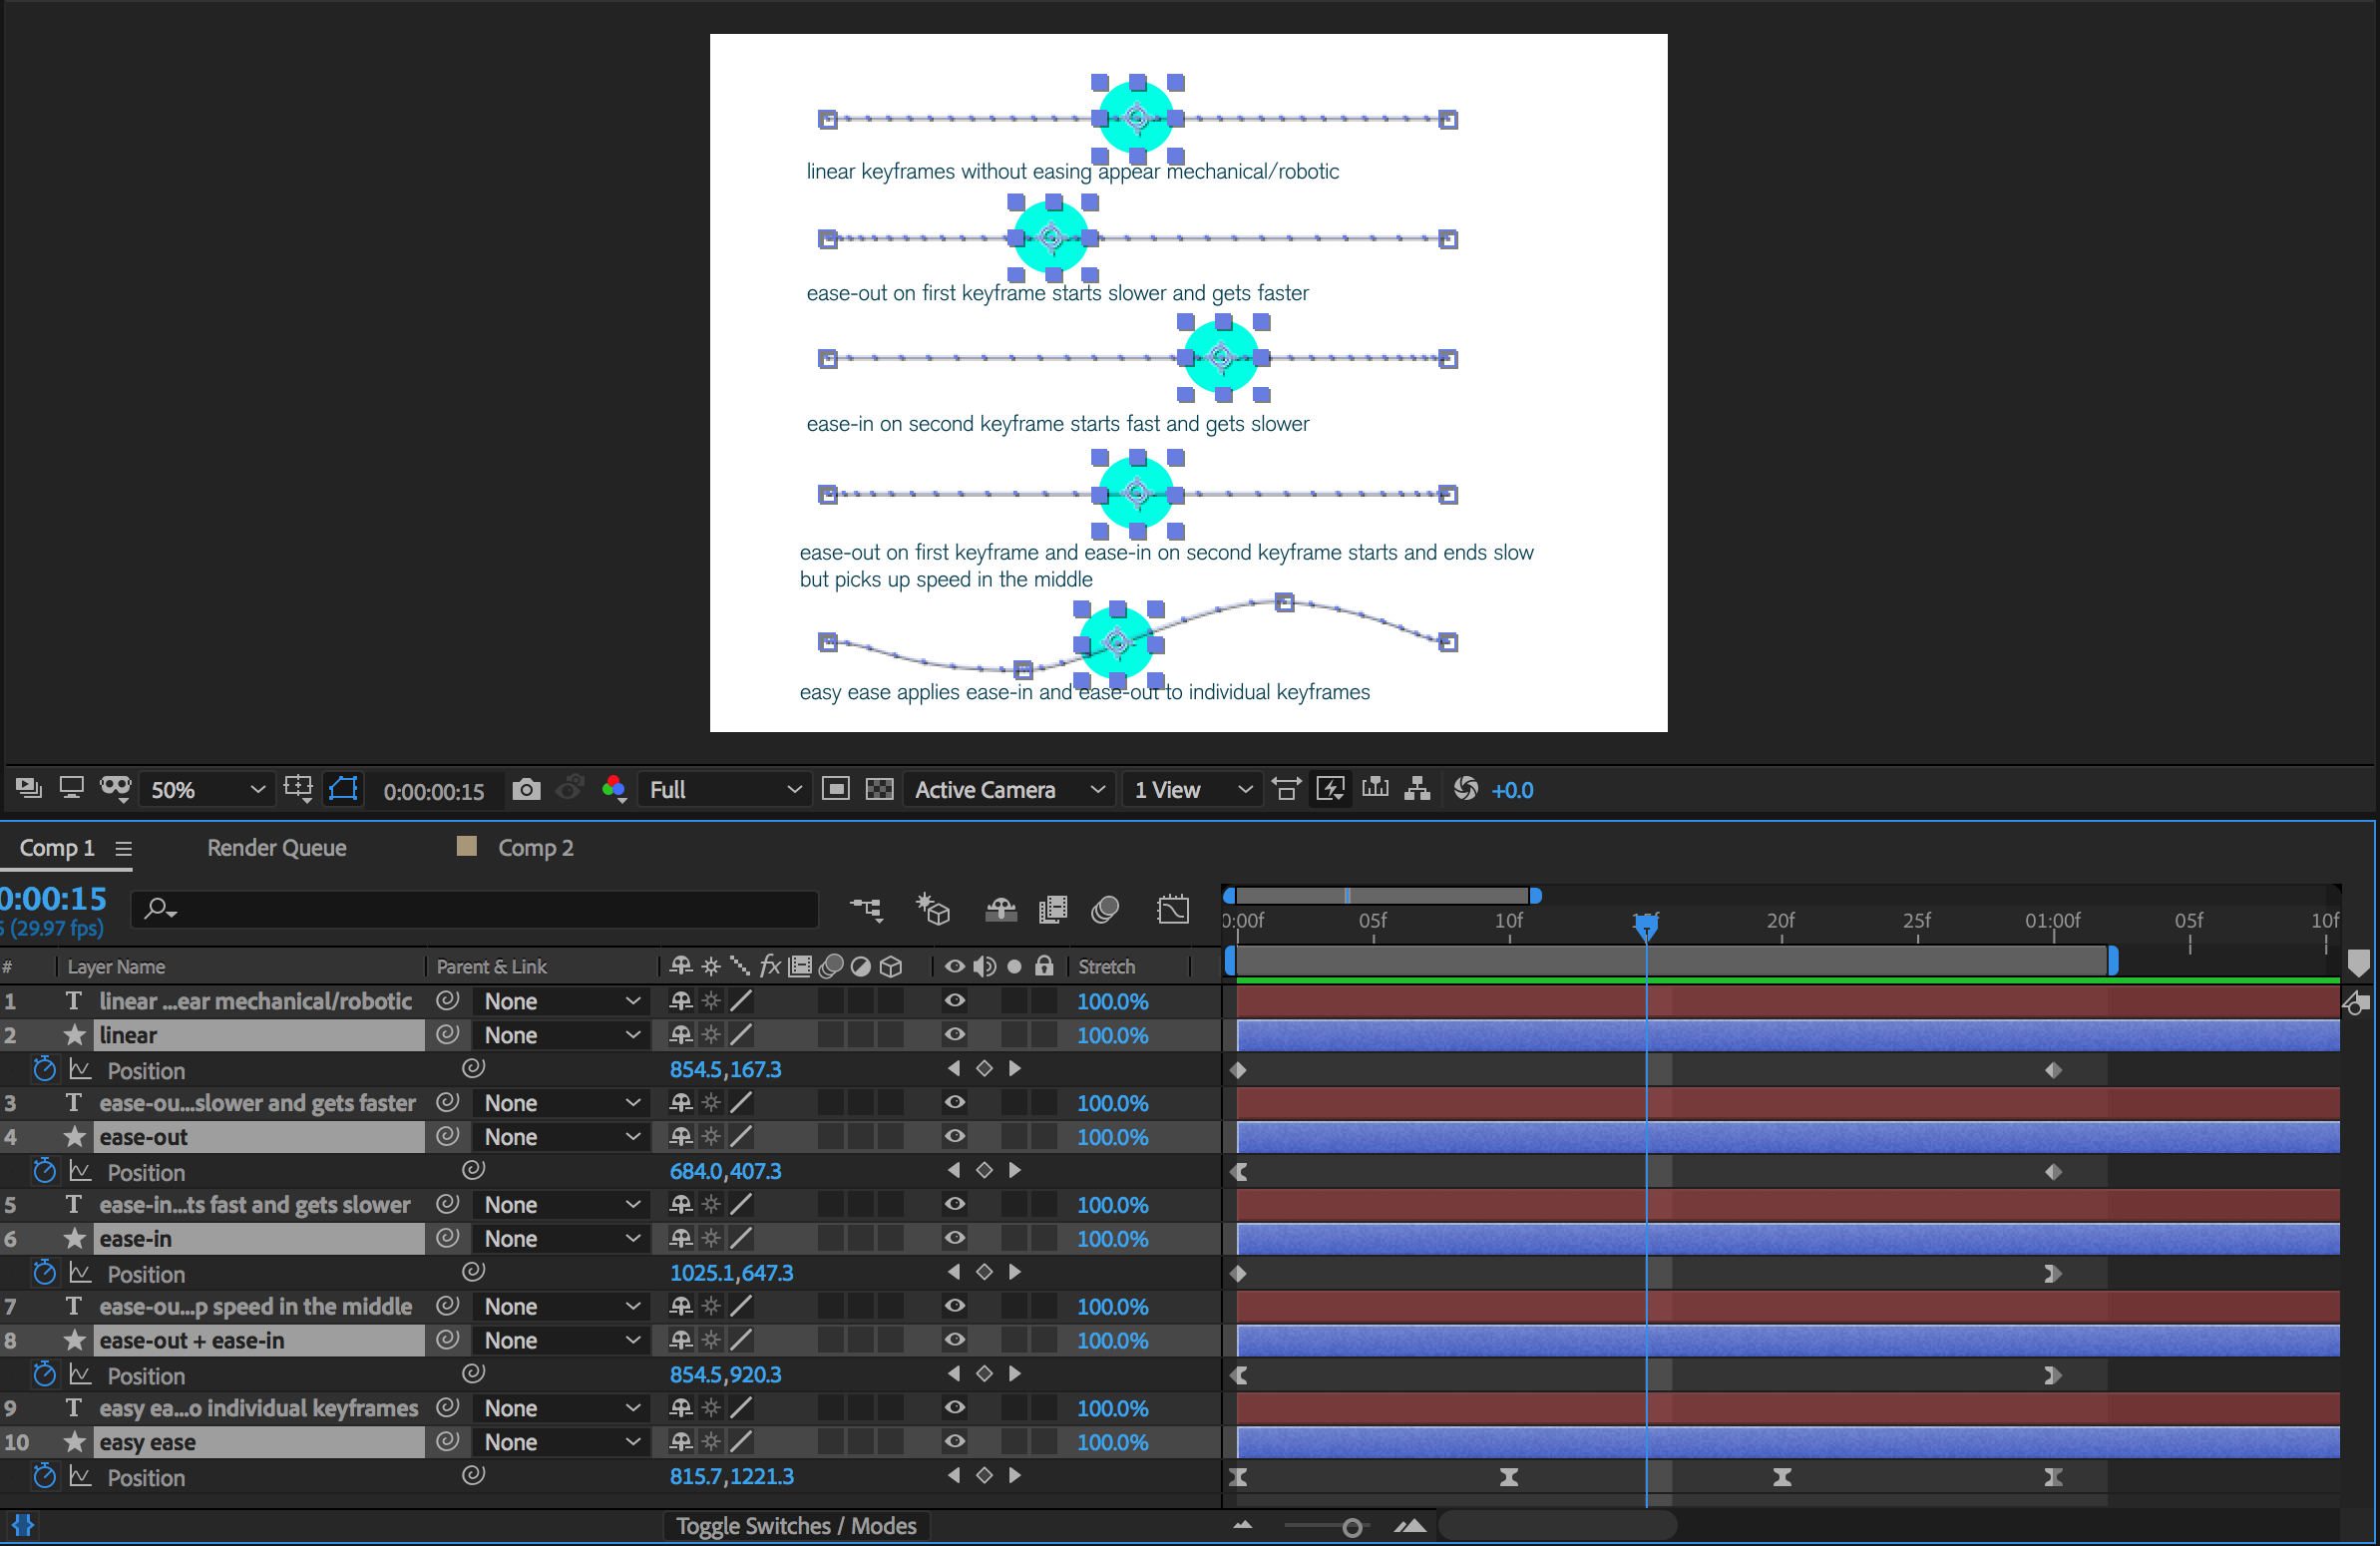
Click to ViewUsing 5 objects with their own motion path, play with varying combinations of easing to see the differences. 1-4 objects only need two keyframes and #5 needs at least three keyframes/positions. (To choose Ease: Right-Click the keyframe on the timeline > Keyframe Assistant). Basic Easing Tutorial
- First object: only linear keyframes – no easing applied
- Second object: apply Ease-Out to the first keyframe
- Third object: apply Ease-In to the second keyframe
- Fourth object: apply Ease-Out to the first keyframe and Ease-In to the second keyframe
- Fifth object: add a third keyframe/position to the motion path and use Easy Ease on all three keyframes.
Pay attention to the different effect these eases have on your objects.

Part 2: Composition – Room (rotation)
Click to ViewAnimate AE shape object(s) within the frame. Treat the frame as if it is a room with walls or borders and keep the elements in action contained. Use easing to create natural motion. Practice animating Rotation property – may need to adjust the anchor point first depending on where you want it to rotate from? (Refer to the demo page for help on adjusting anchor point.)

Part 3: Composition – Window (scale)
Click to ViewAnimate AE shape object(s) within the frame. This time treat the frame as a window and allow objects to cross borders – viewer senses a larger realm of activity and environment outside the borders. Use easing to create natural motion. Practice animating the Scale property – may need to adjust the anchor point first if you don’t want it to scale from the center of the layer. (Refer to the demo page for help on adjusting anchor point.)

Part 4: Depth (opacity)
Click to ViewAnimate varying value shifts (opacity) of AE shape objects to create sense of depth. Objects should appear to be receding or coming closer in space by just shifting the Opacity values. Use easing to create natural transitions.

Part 5: Depth (scale)
Click to ViewAnimate varying scales of AE shape objects to create the sense of depth. Objects should appear to be receding or coming closer in space. May need to adjust the anchor point first. Use easing to create natural motion. (Refer to the demo page for help on adjusting anchor point.)

Start using Graph Editor after this point in exercise and start to practice implementing the Principles of Animation/Motion.
Part 6: Anticipation Principle (choose at least one of the following properties to animate: rotation, position, or scale. use graph editor for easing.)
Click to ViewPractice creating anticipation by practicing with the Graph Editor. You can animate the rotation, position, or scale and you should see the beginning of the motion show ‘anticipation.’ Consider mass and weight of object as you animate.
Part 7: Follow-Through Principle (choose at least one of the following properties to animate: rotation, position, or scale. use graph editor for easing.)
Click to ViewPractice creating follow-through by practicing with the Graph Editor. You can animate the rotation, position, or scale and you should see the end of the motion show ‘follow-through.’ Consider mass and weight of object as you animate.
Part 8: Squash & Stretch + Arcs Principle (create a motion path with position/scale. use graph editor for easing.)
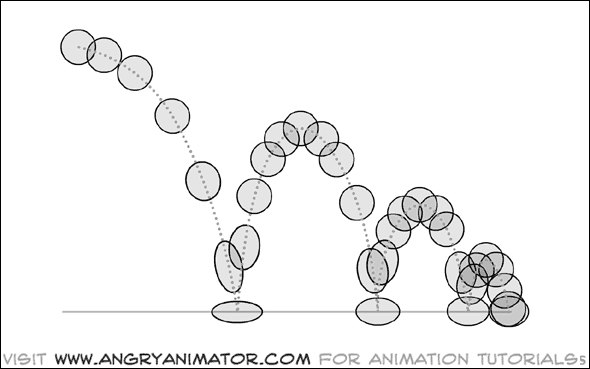
Click to ViewAnimate the position of a bouncing ball on a motion path with natural movement across the screen, creating an appropriate motion path and easing on the keyframes using the Graph Editor to make adjustments. Remember to change the scale when it hits the ground so it squashes and have it stretch when it gets close to the ground. You will need to unlock the Scale parameter, so you can squash it disproportionately – or you can adjust the points on the Shape Path by opening up the contents of the layer until you see Path. Consider mass and weight of object as you animate. Also remember objects move more naturally in an arc type movement.

Part 9: Secondary Action (animate an object or two altering the different properties of your choice. use graph editor for easing.)
Click to ViewPractice spicing up your animation by having your animated object have a secondary change occurring or have a second animated object complementing its movement. Use the graph editor for smoother easing again.
Part 10: Exaggeration and Appeal (animate an object(s) using the different properties of your choice. use graph editor for easing.)
Click to ViewPractice taking things up a notch and communicating a message or feeling. Try communicating an emotion of your choice using just simple AE shapes, exaggerated animation with the graph editor, and design choices like color, shape choice, scale, opacity, etc.
Schedule
Click to View9.28: Assign Exercise 2
9.30: Finish first 5 parts of Exercise2. You don’t need to render/export or upload, but have it finished in your AE timeline.
10.5: Exercise 2 due. Upload mp4 to Vimeo or YouTube and link to Exercise2 Slack Channel.
Final Deliverables:
Click to ViewUpload Exercise 2 mp4 to Vimeo or YouTube and link to Exercise2 Slack Channel.
Should be 1920×1080, mp4, and between 30–50 seconds total.